
Whether you are just getting started or you already have lots of renewals added, the Bulk Import tool is a very handy way to import other renewals you may have in a spreadsheet somewhere. You’ll have to save it as CSV format first though, but that’s easy. Follow the steps below to import your CSV into Support Renewals.
Using the Bulk Import Tool
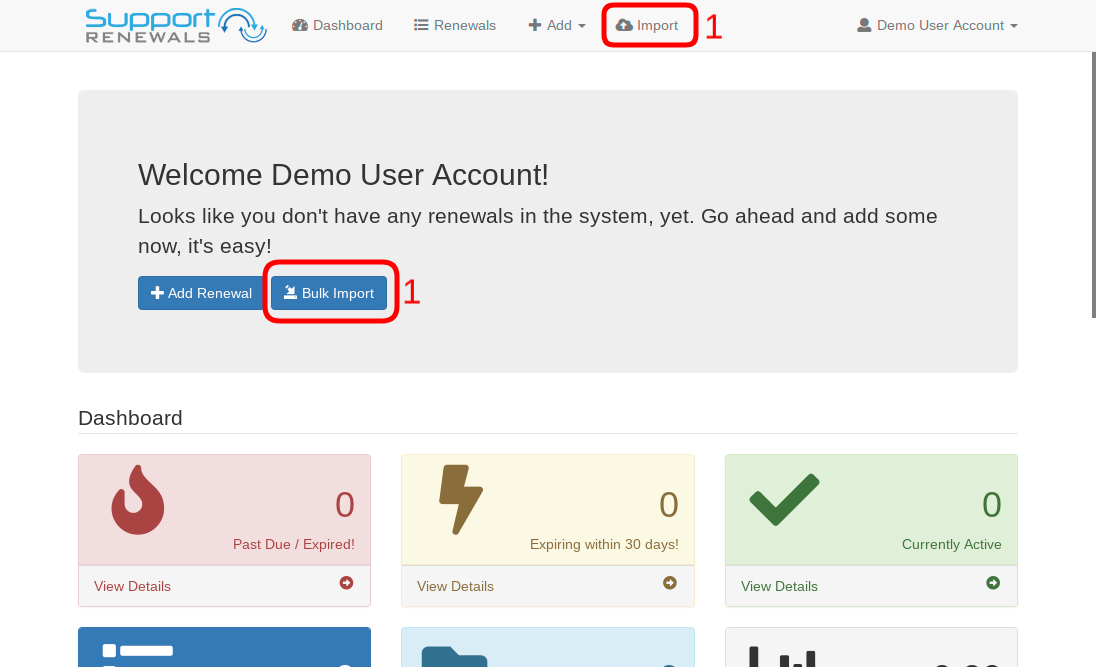
- Select Import from the top menu (1) or under the account menu (top right) or if you are only getting started, from the “Welcome” prompt on the dashboard page.

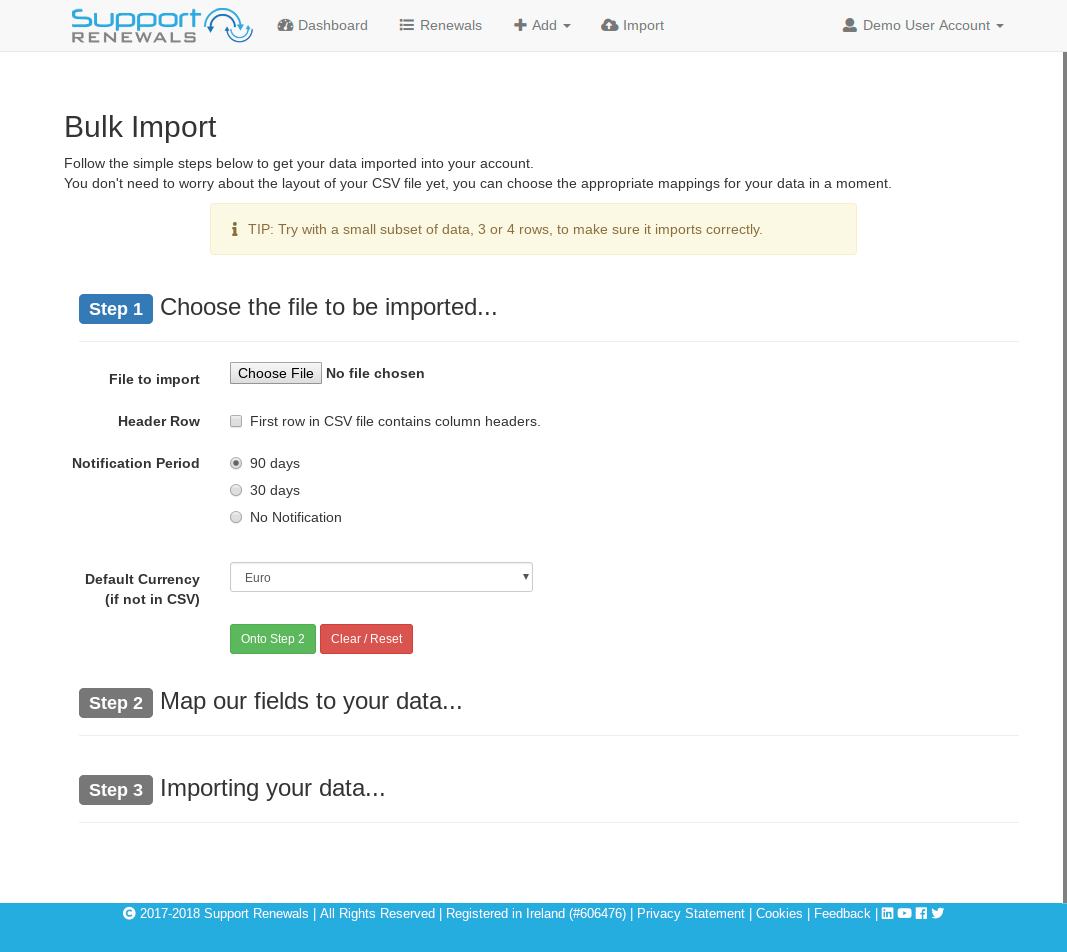
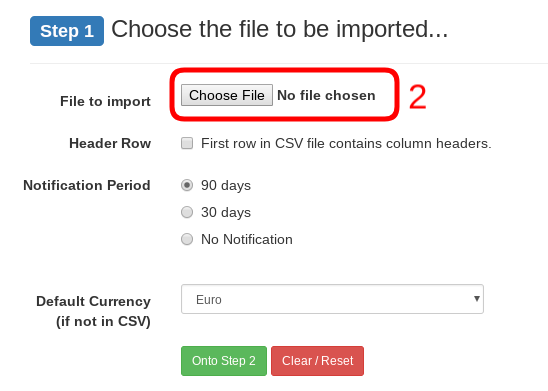
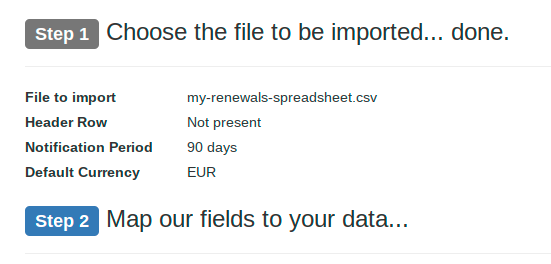
- On the “Bulk Import” screen, under “Step 1”, click the “Choose File” button (2) and navigate to and select your CSV to be imported.
- Once you’ve chosen your file, then set the defaults for the renewals (if not specified in your file).
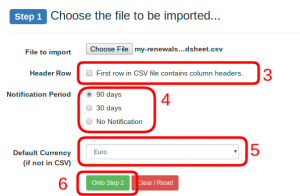
- If your file has a header row (column names on the first line of your CSV file), tick the “Header Row” box (3). We will then ignore this row as part of the import but we will use it in Step 2 to help you choose the correct mappings.
- You can set the notification period for these renewals by selecting 90 or 30 days notice (4). You may select “No Notification” but that sort of defeats the purpose of using this tool, right?! (Notifications can be disabled later per renewal or per account).
- Finally, you can set the preferred currency for these renewals (5). If you are importing costs in a particular currency, set this to the preferred currency. If your CSV already has a currency column in it (in 3 letter format), then our import tool will set that currency for that line instead (only if selected in the mappings!). If there are lines with out a currency set, it will use this “Default Currency” instead.
- When ready, click “Onto Step 2” (6) to begin mapping the fields.
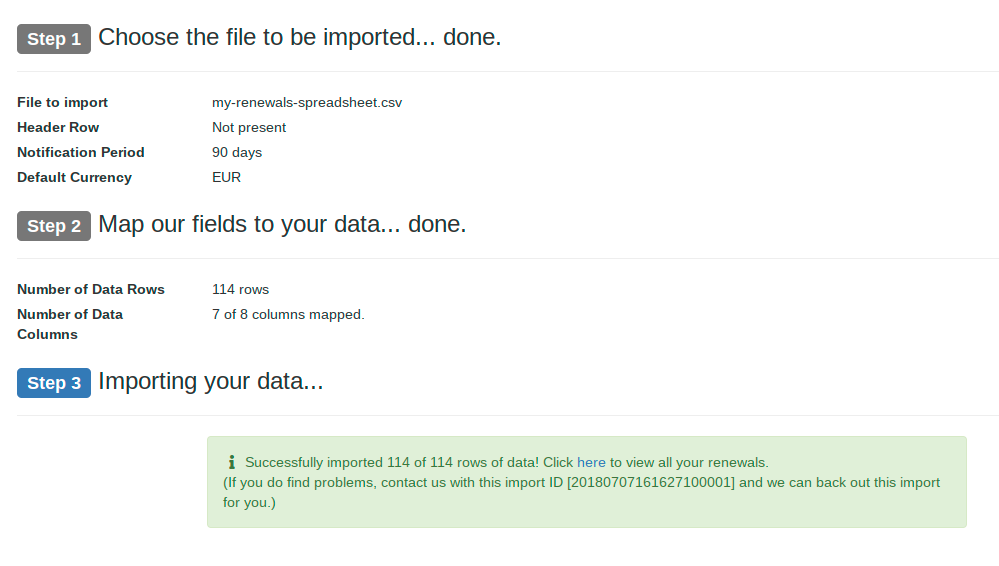
- A summary of “Step 1” will be displayed above “Step 2”.
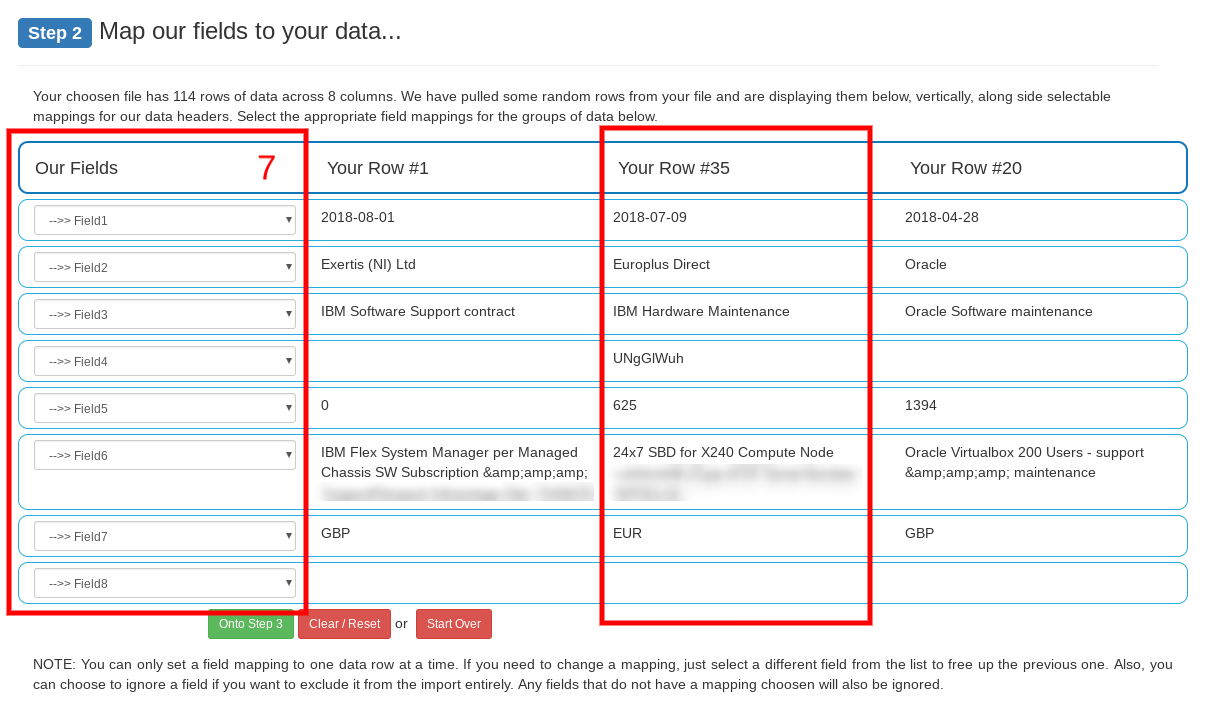
- We read in 3 rows of your file. The first row and 2 other random rows. The columns are presented vertically along side “Our Fields” (7) as drop-down menus lining up with your data. For line, you need to select the appropriate mapping from “Our Fields” best fitting your data. You can ignore columns buy setting the field to “Ignore this” or leaving it marked as “==> Field X”.
- Once you have your field mappings chosen, click on the “Goto Step 3” button (8) to begin the import process.
- A summary of the process will be displayed, indicating the number of renewals imported.
Included in the summary is an Import ID. If you find something wrong with the import later on, you can let us know this Import ID and we can scrub those renewals from the system for you if necessary.
- Finally, click on the Renewals button or Dashboard buttons to view your new renewals data.


NOTE: Currently only importing of CSV files is supported. We will look to adding ability to import Spreadsheets directly at a later date.